 Mueen Studio
A product label has a hard job. In about three seconds it has to tell a shopper what the product is and why it’s better, then hold every legal detail in a few square centimetres, then survive a label press, a filling line and a curved container. Here is how to design one that does all three.
1. Start with the container, not the logo
Every label decision follows from the container, so measure it first, or better, ask your bottle or jar supplier for the technical drawing.
- Label panel height: the flat area between the shoulder and the base where the label can sit without wrinkling.
- Circumference: for a wrap-around label, the length plus an overlap where the two ends meet.
- Visible front: on a round container, only about a third of the label faces the shopper at once. Treat that as your real front panel.
Your label printer will usually supply a template with the cut size, bleed and corner radius. Build on that template from day one; resizing a finished label later always breaks something.
2. Collect and approve the copy before design starts
Labels go wrong when copy changes after layout. Gather everything first: product name, variant, net quantity, claims, ingredients, directions, warnings, the manufacturer’s or distributor’s details, a barcode number, and for supplements a Supplement Facts panel or for food a nutrition panel.
Write it in a document, have your compliance team or regulatory adviser approve it, then hand it to your designer. I lay out the copy you supply clearly; regulatory review stays with your compliance team, because rules differ by product category and market.
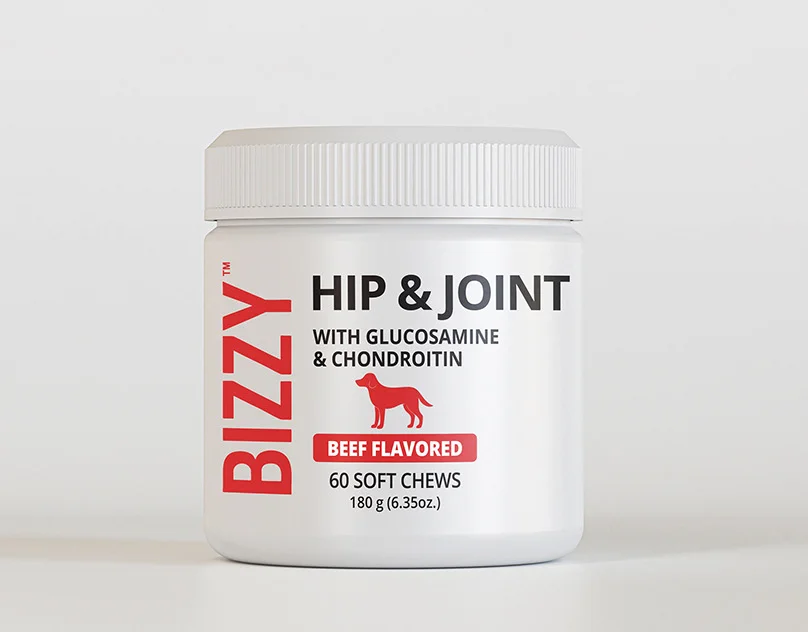
3. Build a three-level hierarchy
A label that tries to say everything at the same size says nothing. Decide what the shopper reads first, second and third.
- Level one, the brand and product name: who you are and what this is.
- Level two, the variant and the main benefit: flavour, strength, scent, or the one claim that sells it.
- Level three, the supporting detail: secondary claims, count, net quantity, certifications.
Test it by printing the front at actual size, standing two metres away and asking someone what the product is. If they hesitate, level one isn’t strong enough.
4. Plan the back and side panels like a form
Information panels are read by people who have already picked the product up and want an answer: how many to take, what’s in it, is it safe for them. Give each block a fixed home: facts panel, ingredients, directions, warnings, then company details and barcode. Use consistent rules and spacing, and keep body text at a size your printer and your market’s rules allow.
The Timeless Radiance case study shows the same discipline on a carton and an 11 g sachet: benefit claims, ingredient infographics, study summaries, usage, storage and warnings, all fitted onto small panels without losing legibility.
5. Design for a range, even if you only have one SKU
Most brands add flavours or sizes within a year. Build the label as a system: a fixed layout where colour, variant name and copy change but the structure stays. Every new SKU is then fast to produce and instantly recognisable as the same brand on the shelf.
6. Choose label stock and finishes early
The material changes the artwork.
- Paper labels are economical and take a matte, natural look, but they don’t like moisture.
- White film labels handle condensation, oils and squeezing, which suits beverages, cosmetics and anything refrigerated.
- Clear film gives the “no-label look”, but colours print transparent unless there’s a white ink layer underneath. That white layer is prepared as a separate plate.
- Metallic stock needs the same white layer wherever colours should look solid rather than metallic.
- Foil, embossing and spot varnish each need their own layer, matched to your printer’s specification.
7. Get the barcode and the batch area right
Place the barcode on a flat-facing area, never around a tight curve, at a size your retailer accepts, dark bars on a light background, with clear space on both sides. Leave a blank area for the batch number and expiry date if they’re printed or stamped on the line. Ask your filler where their coder prints, before you finalise the layout.
8. Prepare print-ready files and proof on the real container
A print-ready label file has the artwork on the printer’s template with bleed, text converted to outlines, images at full resolution, colours in CMYK or the specified spot colours, and separate layers for white ink, varnish or foil. Send a PDF for print and keep the editable Illustrator file.
Then print a proof at 100% and wrap it around the actual container. You’ll spot what a screen never shows: a claim hidden by the overlap, a logo too close to the shoulder, text too small to read.
Want this done for you? See formats, examples and what’s included on the product label design page. A single label is $150–180 and usually takes 3 to 7 days including revisions.
Common label design mistakes
- Designing on a flat rectangle without the printer’s template, then discovering the corners are rounded.
- Putting key claims near the overlap, where they disappear on a wrap-around.
- Printing on clear film without a white layer and getting faded colours.
- Editing copy after layout without re-checking the facts panel.
- Skipping the physical proof.
Before freelancing I spent four years as the in-house packaging designer at a cosmetics manufacturer, doing press checks on the factory floor, and these are the mistakes I saw stop the line most often.